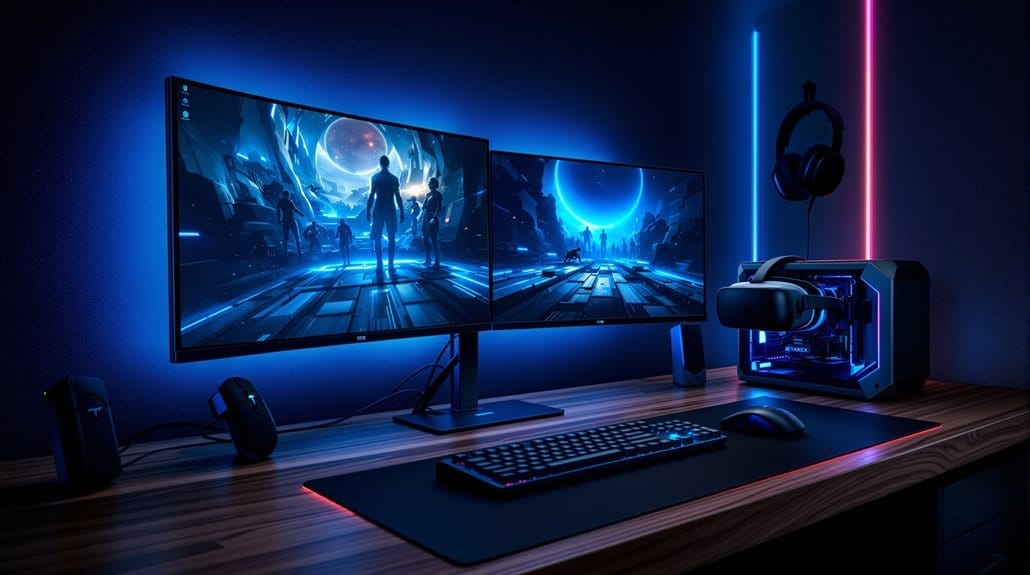
VR-Ready PC Gaming: Essential Setup for Immersive Worlds
Make sure your VR setup hits a solid 90 to 120 frames per second for each eye to get smooth, lifelike action. The GPU is the heart of this—an RTX 4090 pumps out 4K-level power, while an RTX 3060 or RX 6600 handles lighter VR experiences just fine. Pair it with an i7 or Ryzen 7 processor and 16 to 32 gigs of DDR4 or DDR5 RAM to keep things running steady. Don’t skimp on storage—grab a 1-terabyte NVMe drive for speedy loading. Look for DisplayPort 1.3 or higher and USB 3.0 ports so nothing slows you down. Avoid Windows N or S versions since they can cause headaches. Keep your GPU and headset software up to date for the best ride. Use smart tricks like foveated rendering, single-pass rendering, asynchronous reprojection, and adaptive scaling to squeeze every bit of performance. This info helps gamers and VR fans who want a powerful, smooth experience without mysteries or lag—dive in and see how to keep your VR build sharp well into the future.
Minimum and Recommended Specs for VR-Ready PCs
Start with the floor, then aim higher: for baseline VR, target at least an Intel i5-4590 or Ryzen 5 1500X, 8GB RAM, a dedicated GPU on par with GTX 970/R9 290 with 3GB VRAM, Windows 10 64-bit, and USB 3.0 ports. Those are the pc vr requirements that clear entry-level performance.
For smoother frame pacing, step up to 16GB RAM, Windows 11 (fully updated), and a modern quad/hexa-core like Intel i3-14100 or Ryzen 5 4500 to reduce CPU-bound drops. Prefer NVMe SSD storage (1TB minimum) to cut load times and asset stutter; dual NVMe helps heavy libraries. Power the system with a quality 650W 80+ Gold PSU (750W if you plan headroom). For high-end VR, consider upgrading to a RTX 3070-class GPU or better to ensure consistently smooth visuals.
Integrated graphics don’t qualify; use a discrete card with ≥3GB VRAM. Keep chipset/GPU drivers current for stability.
Choosing the Right GPU for High-Fidelity VR
Anchor your choice in frame-time targets and headset resolution: for smooth, high-fidelity PC VR, prioritize GPUs that sustain 90–120 FPS at your headset’s per-eye resolution with headroom for reprojection.
If you’re chasing maximum fidelity, the RTX 4090 sets the bar: 16,384 CUDA cores, 24GB GDDR6X, ~1,000 GB/s bandwidth, and Ada’s RT/Tensor advances keep frame times tight at 4K-class loads. Choosing an appropriate GPU is essential because VR performance depends on consistent frame rates to avoid discomfort.
It also excels at HEVC VR streaming. Next-gen cards with DisplayPort 2.1a future-proof for 4K-per-eye/120Hz headsets.
On value, RTX 3060 (12GB) handles 1080p VR reliably; RX 6600 and RTX 3050 are entry points for lighter workloads. Favor higher VRAM, robust cooling, and updated drivers.
DLSS helps throughput, though multi-frame variants aren’t VR-optimized yet. Shortlist “top-tier gpus for high-fidelity vr” if you demand uncompromised results.
CPUs That Keep Frame Times Low
Chase low frame times, not just high averages: in VR, CPUs with strong single-thread throughput, fast boost clocks, and large L3 caches deliver steadier 90–120 FPS with fewer spikes.
Prioritize cpu architectures optimized for low frame times in vr: Zen 5 X3D parts and Intel’s Raptor Lake Refresh lead.
In testing, Ryzen 7 9800X3D’s 96MB 3D V-Cache cuts cache misses and trims 1%/0.1% lows better than similarly clocked rivals. The Intel Core i9-14900K’s hybrid design with high peak clocks and ample E-cores delivers excellent frame pacing in demanding VR, especially when paired with fast RAM.
Ryzen 7 7800X3D remains a price/perf standout with near-top frame pacing.
Intel’s Core i9-14900K posts excellent frametimes in simulation-heavy scenes thanks to high peak clocks and ample E-cores for background threads.
For value, Ryzen 5 7600X keeps lows tight at mid settings.
Maintain cooling; sustained boosts prevent thermal-induced spikes.
How Much RAM Do You Really Need?
Cut through the guesswork: while 8GB meets bare-minimum specs, it bottlenecks VR with frequent paging and unstable frame times.
In practice, you’ll see stutters, input lag, and dropped frames when scene complexity spikes.
Target 16GB DDR4 RAM as the baseline; it keeps frame pacing consistent and reduces pagefile hits.
If you stream, run mods, or keep multiple apps open, 32GB delivers headroom for higher textures and smoother transitions.
Enthusiasts building for tomorrow’s titles or heavy creators can justify 64GB, especially on DDR5 for bandwidth and latency gains. For smoother VR, remember that performance depends on the combination of components and the headset working together.
- Expect 10–20% fewer frametime spikes moving from 8GB to 16GB in modern VR titles.
- 32GB cuts background contention, stabilizing 90/120 Hz targets during busy scenes.
- DDR5’s higher throughput trims micro-stutter versus equivalently sized DDR4.
Storage Choices: NVME Vs SATA for Faster Loads
You’ll see NVMe drives post 5–6x the sequential throughput of SATA SSDs and lower latency, translating to faster level loads, quicker save reloads, and smoother texture streaming in DirectStorage-enabled titles. Both dramatically reduce load times compared to HDDs, but NVMe typically delivers noticeably faster game loading times than SATA. Benchmarks in open-world and MMO scenarios consistently favor NVMe for asset streaming bursts, while in-match performance changes little once data sits in RAM. If you’re budget-conscious, SATA still offers excellent value and reliability over HDDs, with only occasional micro-pauses during heavy streaming workloads.
NVME Speed Advantages
How much faster does NVMe feel in real games? With NVMe SSDs, you’re tapping PCIe bandwidth that’s 5–6x higher than SATA’s ~550 MB/s cap. On PCIe Gen 3 x4 you’ll see ~3,500 MB/s; Gen 4 x4 doubles that to ~7,000 MB/s. In benchmarks, open‑world titles stream textures and geometry more smoothly, cutting pop-in and reducing hub-to-field transitions. Big sequential assets load quicker, but games pulling thousands of tiny files often show marginal gains. CPU decompression and engine design can bottleneck throughput, so some loads look similar to high-end SATA.
- Open-world streaming (Cyberpunk, RDR2): visibly fewer stutters and faster fast-travel.
- Battle Royale: slightly quicker first load; minimal in‑match impact.
- Heavy multitasking: higher IOPS keeps downloads, updates, and background tasks responsive while you launch.
SATA Value and Reliability
NVMe’s higher throughput sets the pace, but SATA SSDs still deliver strong value in real games. In a vr gaming setup, a SATA SSD’s ~600 MB/s is miles ahead of HDDs and keeps frame data fed once you’re in-world; the penalty shows mainly in level transitions and giant asset pulls. Benchmarks typically show longer map loads versus NVMe, but minimal impact on in-session streaming where RAM and GPU matter most.
SATA also wins on reliability and cost. Mature controllers, no moving parts, and wide motherboard compatibility make upgrades painless and stable over years, with wear leveling and firmware updates sustaining consistent performance. Use a fast NVMe for OS and top VR titles, pair a high-capacity SATA for bulk libraries—maximizing capacity per dollar without complicating thermals or power.
Cooling and Power Considerations for Stable VR
Drive consistent VR frame times by prioritizing thermals and power headroom: dual-screen rendering hammers CPU and GPU, so inadequate cooling or a weak PSU translates directly into throttling, stutter, and latency. Size your cooler to sustained loads, not peak boost. Tower air coolers work for midrange, but a 360mm AIO keeps high-end parts under 80°C during long sessions, especially with top GPUs.
Build positive or balanced airflow using front/bottom intake and top/rear exhaust; target 5+ quality fans and tuned curves.
- Power supply considerations for vr-ready pcs: choose 80 Plus Gold (or better), 650W for midrange, 850W+ for 4090-class; modest oversizing stabilizes transients and reduces heat.
- Prefer modular PSUs to cut cable clutter and improve case airflow.
- Validate thermals with repeatable logs (GPU/CPU clocks, temps, fan RPM) and adjust.
Headset Compatibility, Ports, and Cable Management
Before you plug in, verify your headset’s exact requirements—OS, CPU/GPU support (e.g., no Intel Arc for Meta Quest Link), RAM, and port specs (USB 3.0/USB‑C, HDMI/DisplayPort)—so your build clears both minimums and recommended targets.
Then optimize ports and cabling: prioritize USB‑C for bandwidth, match video outputs (e.g., DP 1.3+ for Reverb G2), and use a 3 m, high‑quality data+power cable or active/fiber runs to prevent throughput bottlenecks.
Finally, benchmark comfort and signal stability with proper cable management—overhead routing, Velcro, and strain relief—to reduce snagging and packet errors under motion.
Verify Headset Requirements
Kick off your PC VR build by matching the headset’s hard requirements to your rig’s real-world specs. Treat this as a specs audit: confirm headset compatibility with PC hardware, then validate OS, ports, and power. Aim for at least a GTX 1060/1070 or RX 470/580; faster GPUs better sustain high resolutions and 90–120 Hz.
Pair that with an i5-4590/Ryzen 5 1400 or stronger, and 12–16GB RAM for consistent frametimes. Check DisplayPort 1.3/1.4 (or HDMI 1.3+) per model, and ensure at least one reliable USB 3.0—plus Bluetooth 4.0 if controllers require it. Avoid Windows N/S modes; use Windows 10+.
- Compare your GPU’s VRMark/3DMark results against headset targets
- Verify port standards on both GPU and headset before buying adapters
- Plan safe, strain-relieved cable paths and adequate length
Optimize Ports and Cabling
Dial in ports and cabling like you’d a benchmark run: match the headset’s exact video and USB needs, minimize adapters, and verify bandwidth on every link.
Prioritize native outputs—DisplayPort 1.2+ for Vive Pro–class headsets, Mini DP for Rift S (via the included adapter), and avoid DP-to-HDMI unless it’s an active adapter rated for the target resolution/refresh. Confirm GPU ports meet HDMI 1.3+ or DP 1.2+.
Treat USB as a throughput test. Use USB 3.0+ ports for headsets and sensors; prefer motherboard ports over unpowered hubs. For Quest via usb c link cable, pick a certified 3m cable supporting data and power, then validate stability with sustained transfers.
Cable-manage like airflow: route overhead or along walls, label runs, secure slack, and routinely inspect for wear.
Software Setup: OS, Drivers, and VR Platforms
While hardware sets your ceiling, software setup determines whether you actually hit it: run a 64-bit, fully updated Windows 10 or 11 to ensure broad VR compatibility, install the latest GPU drivers (NVIDIA/AMD) and the appropriate platform runtimes (SteamVR, Meta PC app, or Windows Mixed Reality), and verify headset-specific software is current.
Treat OS, drivers, and platforms like a performance stack: a weak layer bottlenecks the rest. Prioritize Windows because VR toolchains and drivers target it first; os updates can improve vr performance and security, and maintaining the latest os version is recommended. Keep USB controller drivers current to avoid bandwidth contention for sensors and cameras. Validate runtime versions before sessions, and prefer manual checks around major releases.
- Compare runtimes: stability, tracking fidelity, overlay overhead
- Benchmark drivers: frame pacing, reprojection behavior, crash rate
- Audit USB paths: port speed, controller load, bandwidth headroom
Tuning Graphics and Frame Rate to Reduce Latency
Even with the right OS and drivers, you’ll only hit low-latency VR by tuning the render path for stable, high frame rates. Start by profiling CPU/GPU with Nsight or Radeon GPU Profiler, then target 90+ FPS to minimize pc vr latency. Prioritize foveated rendering (where supported) to cut GPU load by up to 50%, and switch to single-pass rendering to stabilize frame timing.
Reduce overdraw via lean shaders and aggressive occlusion/frustum culling; expect up to 50% gains in dense scenes. Implement LOD groups (30–60% load cuts) and simplify collision meshes. Batch statics and atlas textures to slash draw calls. Trim shadow resolution or bake lighting; throttle real-time effects over visuals. Use dynamic quality scaling and asset streaming to avoid spikes. Enable asynchronous reprojection for smoother delivery.
Future-Proofing Your Build for Next-Gen VR
Hitting 90+ FPS today is only half the battle; to future-proof your rig, spec for dual 4K-per-eye at 120 Hz with headroom. Prioritize a high-end GPU with strong VR drivers, 8GB+ VRAM, and hardware scheduling; pair it with an i7/Ryzen 7-class CPU for physics, AI, and input. In a vr headset comparison 2025, micro‑OLED panels, 120–144 Hz, HDR, and wider FOV (≈120 x 105) punish weak GPUs; plan for sustained frametimes, not peak FPS.
- Target NVMe storage (≥1TB) for fast asset streaming and keep 20% free space to avoid write throttling.
- Use 16–32GB low-latency DDR4/DDR5; VR multitasking and eye-tracking pipelines benefit from memory bandwidth.
- Benchmark with synthetic (OpenVR/SteamVR) and real titles; verify frame pacing, reprojection rates, and encode overhead for Link/PCVR.
Conclusion
You’re ready to ship frames, not excuses. Lock in a GPU that sustains native resolution at 90–120 Hz, pair it with a low-latency CPU, and back it with 32 GB RAM and NVMe storage. Use certified USB-C/Link cables, current firmware, and clean drivers. Tune per-title with frame timing overlays, ASW/FG toggles, and sensible supersampling. Avoid unsupported GPUs; validate with repeatable benchmarks. With this stack, you’ll hit consistent frametimes, minimal reprojection, and headroom for next‑gen render paths.